Pinterest for the win!!!
Pinterest is a teachers best friend when it comes to classroom ideas. PS-LipstickandKettlebells has a Pinterest page too that you can follow!!
Anyway, when I first saw my classroom in my new school, I knew that it could look fantastic. However, I was lacking motivation to figure out how to do that. My last few weeks of summer was spent trying to order posters that would match my new prep (subject taught) and coming up with a new room theme.
Yes…classrooms need a theme people. You don’t just slap stuff up because that will result in your classroom looking like the teacher store threw up all over your walls.
Anyway, I settled on a burlap and chalkboard theme with a shabby sheek type vibe. Why? Well, I found cute editable printouts on Teachers Pay Teachers and I had access to a large roll of burlap for free.
So armed with a dream, I searched Pinterest for ideas. I had a problem. My classroom had a very prominent white board on one wall that was ruined. It had large black patches on it that rendered it unusable. I needed to cover it without causing any further damage to the board. That is when I had the idea to make it my student work wall.
For those non-teachers out there, a student work wall is an area dedicated to displaying high quality student work. This can easily be done in a house to showcase children’s accomplishments too.
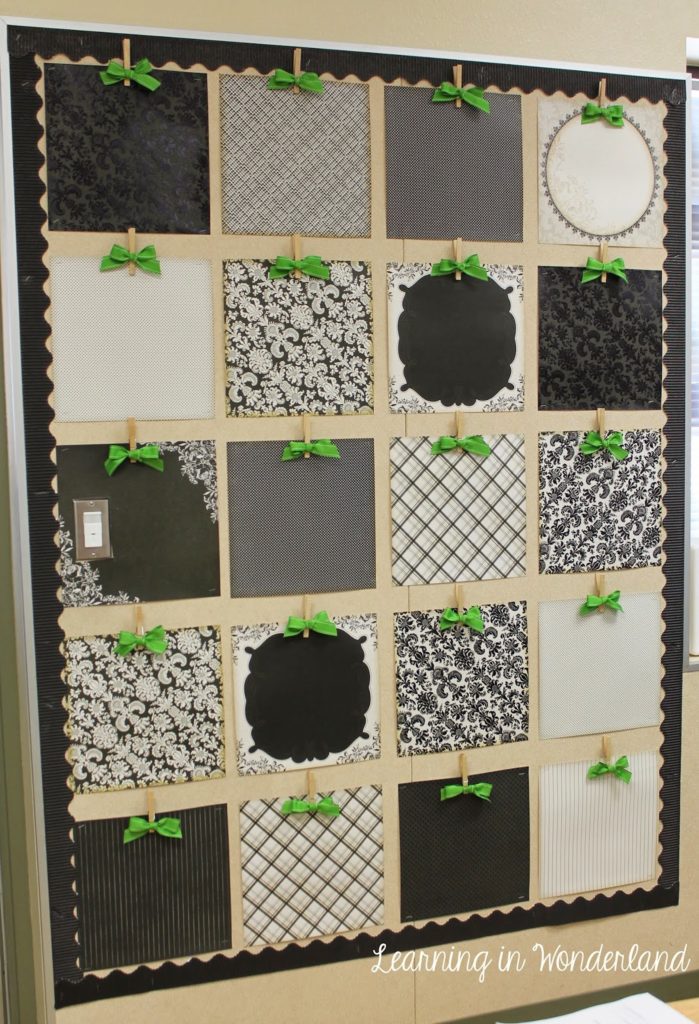
I finally “pinned” and decided on this lovely design by Learning in Wonderland.
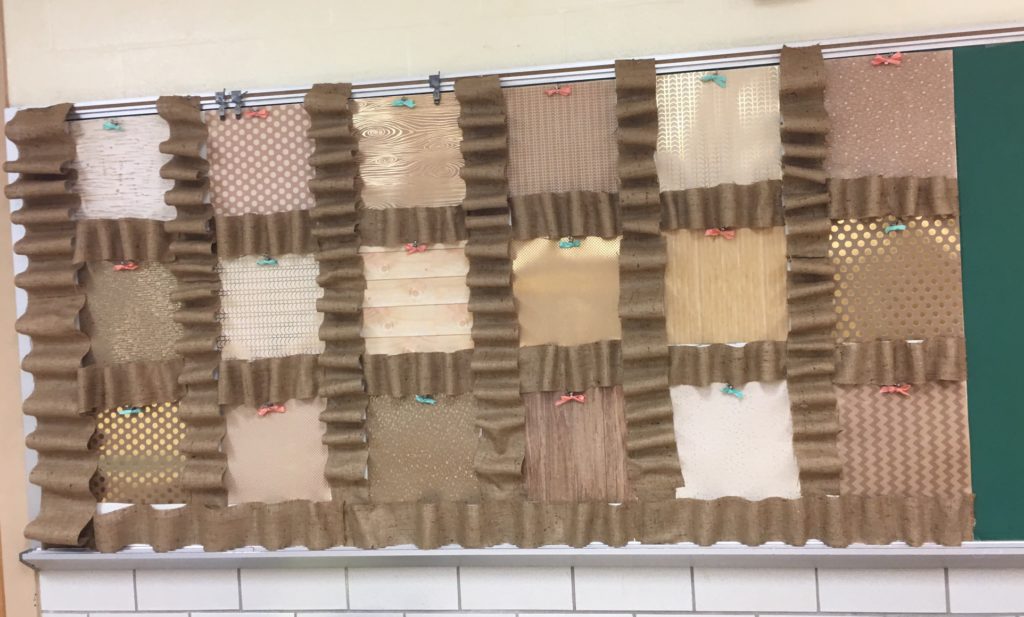
I decided to use this idea to do a similar board. I wanted the individual panels to be divided by strips of burlap that was scrunched similar to my bulletin board borders.
The end result was this beauty.
Materials Needed for a similar look:
-
- Scrapbook paper pack in a design that matches your theme.
-
- Burlap Fabric
-
- Large size Glue gun or staple gun if you are using a cork board.
-
- Ribbon in an accent color that you prefer.
Steps to create the look:
- Measure and mark out a grid of where you want to place your paper and how large of a border you would like between the paper.
- Lay out and glue or staple the paper in the planned grid pattern. **Note: I did not laminate my paper because it was nice heavy weight and I did not want the shiny laminating film to take away from the matte and metallic properties of my paper choices.
- Create the burlap border by creating a wavy look by starting at the top and sides of the board. Secure the burlap strip with either glue or staples and continue to secure after each loop of the wave.
- Last step is to finish the look with ribbon and clips. Make little bows with the ribbon that you have chosen. The size of the bow is up to you and how you want your board to look. Secure the ribbon bows to the clips with glue and then adhere the clips to the top/center of each paper block. Note: If making bows is not in your wheelhouse of skills, you can buy them already pre-made.
There you have it…if you try this idea, feel free to post a picture of your creation.

